Purchase and Sale Entry with GST in Tally Prime 2024: In purchase and Sale entry, whether cash or credit, the procedure in TallyPrime remains similar. The only difference is a user has to select some money or bank for cash purchases or sales and the supplier ledger for credit purchases or sales. In this article, we will discuss in detail the purchase and sale entry with GST in Tally Prime 2024.
Purchase and Sale Entry with GST in Tally
Pass Purchase entry: Once the company has activated GST, they can record the purchase of goods and services (inward supply) that attract GST using a purchase voucher. TallyPrime provides the user with the flexibility to use the different invoice modes interchangeably for recording purchases.
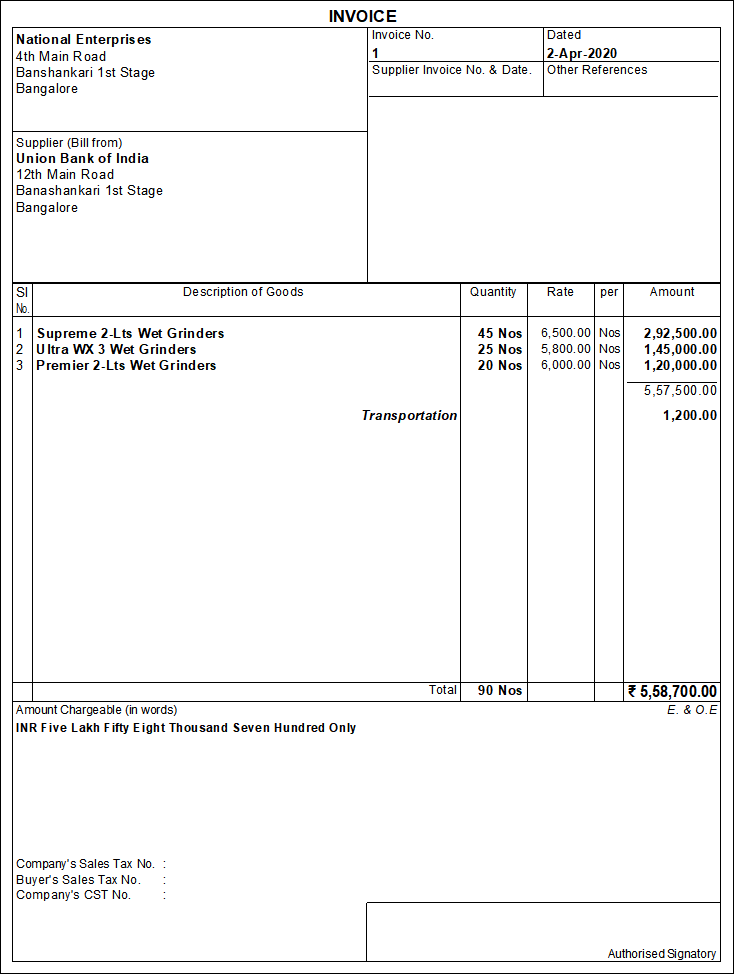
Accountant records purchasing of items using Item invoice mode and purchase without items in Accounting Invoice mode. A user can also print the invoices with the necessary details if needed. Must Check Going Concern Concept.
To record purchase entry with GST, follow the steps mentioned below:
- Go to Gateway of Tally > Select Vouchers > press F9 to open the (Purchase) screen. You can also press Alt+G (Go To) > Create Voucher > press F9 (Purchase).
- Now PressCtrl+H(Change Mode) to select the required voucher mode (Item Invoice)
To pass Purchase entry with GST: Select the shared purchase ledger during the transaction. You can Press F12 (Configure) to set the option”Modify Tax Rate details for GST” to Yes. Select the Classification/Nature.
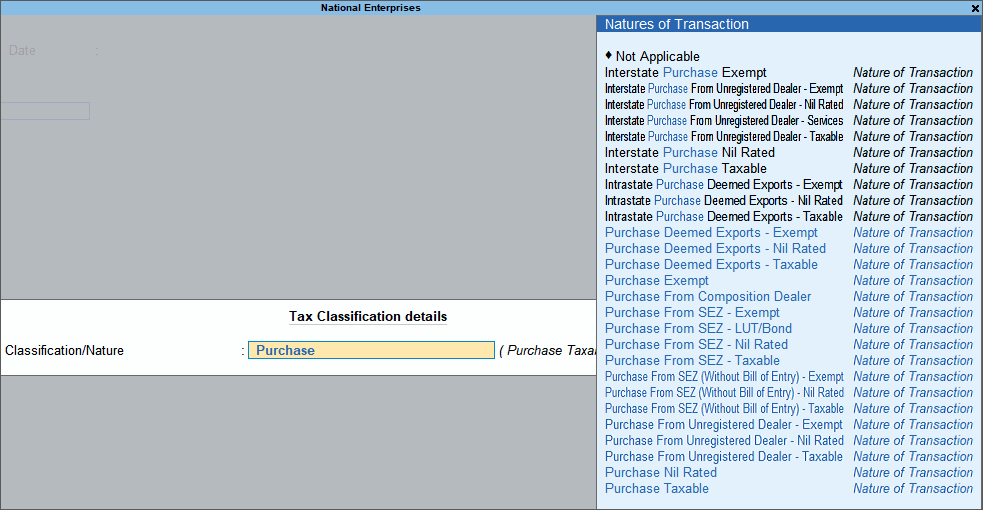
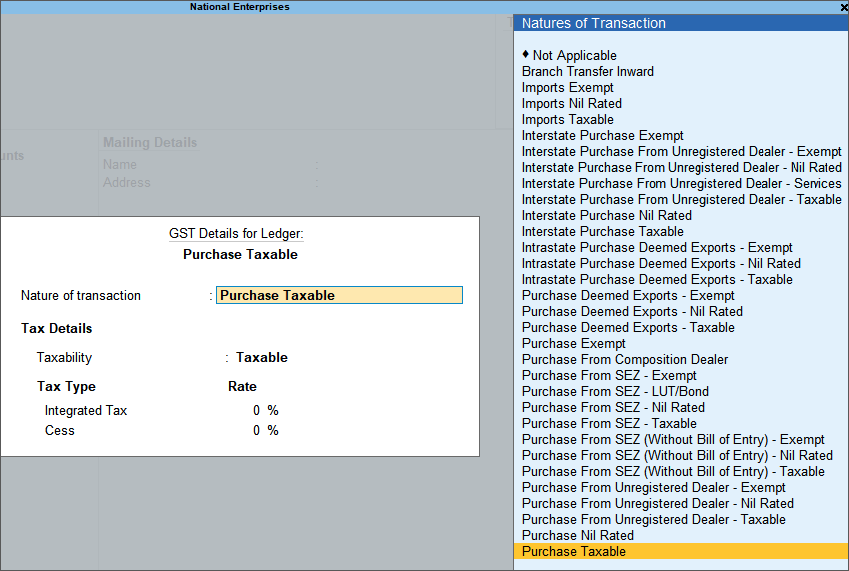
- Specify the supplier details in purchase and sale entry, for example:
- Supplier Invoice No. and date: The invoice number and date will be the same as the sales bill.
- Party A/c name: You have to Select the Cash or Bank for cash purchases. For credit purchases, select the supplier ledger.
- Select the common purchase ledger in which the GST rate is not defined.
- Select the stock items defined with different GST rates, and specify the quantities and rates for each of them.
- Party Details: After supplier details, Enter the supplier’s name and address, if needed.
- PressF12(Configure) if you do not see theParty Details screen and setProvide Receipt, Order, and Import detailstoYes.
- Select the central and state tax ledgers. GST will be calculated based on the GST rates defined in the stock items. Must Check What is Net Salary?
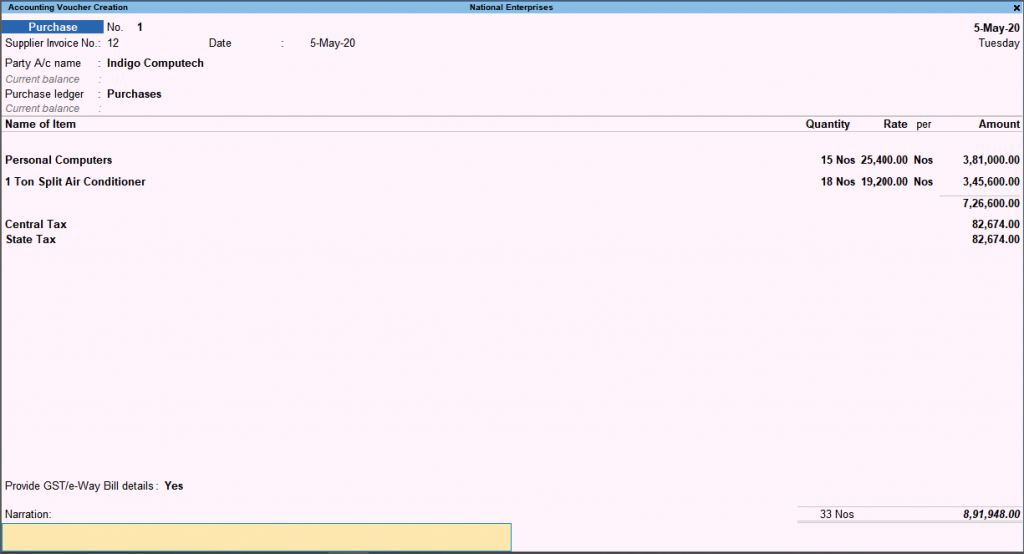
Note: If you want to enter specific details about the suppliers in purchase and sale entry, such as address with a landmark, alternative contact number, etc., in the invoices. Then, you can create party ledgers with the required details. In the Suppliersfield and; Party Details screen; select the necessary ledger.
- Purchase ledger: Select the accounting ledger to allocate the stock items.
Press F12 (Configure) if you do not see the purchase field on the screen, and select “common Ledger Account for Item Allocation” to Yes.
- Now go to accounting Invoice and; select purchase ledger under Particulars
- Provide the stock item or service details.
A user can also create the item or ledger while passing the entry by pressingAlt+C.
- In Item Invoice, select the stock item and enter the quantity. The Rate will be auto-filled if available for the stock item. Or you can enter the Amount or Quantity.
- In Accounting Invoice, select the service ledger and enter the amount.
- Select additional ledgers, like transportation charges, insurance, or discounts, if any.
- Now you can ProvideNarrationif needed
- Accept the screen. Or, to save, you can press Ctrl+A.
- PressCtrl+I(More Details) and; type or select GST – Tax Analysis to view the tax details. PressAlt+F5(Detailed) to view the detailed break-up of tax.

To Print the purchase invoice created:
- First, Press Alt+P (Print) and; press Enter.
- Now Press I (Preview) to check the invoice details before printing if needed.
- At last, you can Press P (Print) to print.
- The print of the invoice in the Purchase and sale entry remains the same in GST tally prime.
Purchase and Sale Entry with GST in Tally
Sales Entry with GST: To record sales of goods, A user selects cash or bank for cash sales and a party ledger for credit sales. A user can record sales of goods or items in the Item Invoice mode. TallyPrime’s different features provide other ways, such as Accounting Invoice mode and Voucher mode, to record sales of goods or services. Based on their requirement, an accountant uses the different methods of the voucher interchangeably for recording sales transactions. Must Read How to Finalize Balance Sheet.
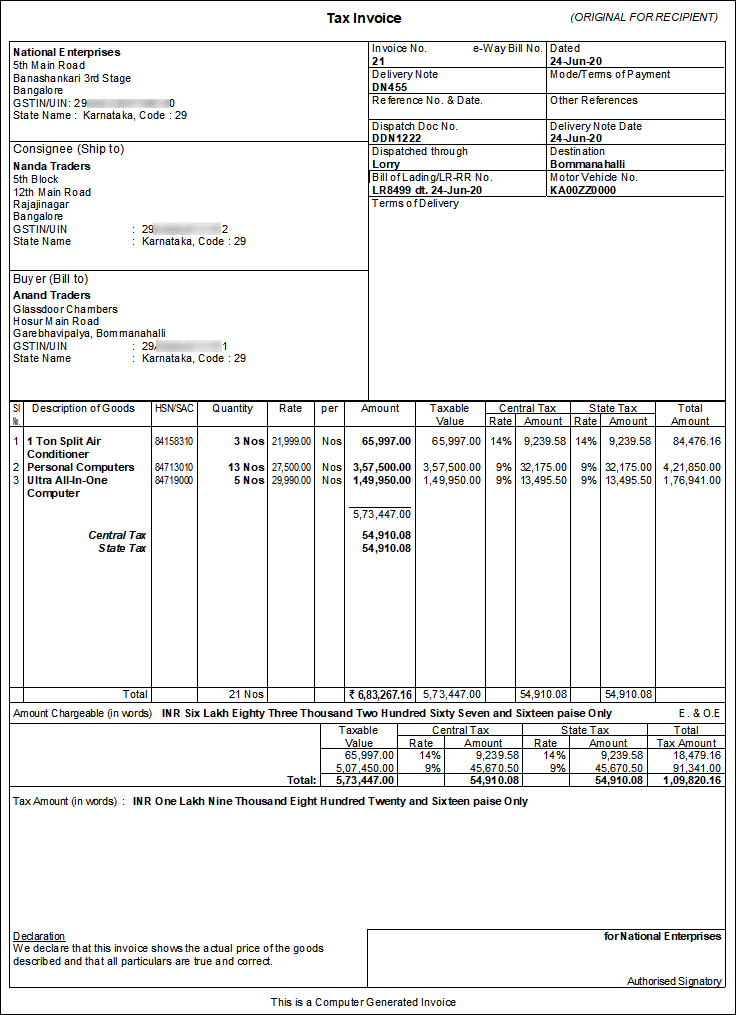
A user records sales under GST and prints a valid GST tax invoice with the party’s GST registration and location, item details (HSN or SAC), and tax rates.
To record sales transactions with GST in the tally, follow the steps mentioned below:
- Go to Gateway of Tally> Select Vouchers > Press F8 to record (Sales) vouchers. Or you can press Alt+G(Go To) > Create Voucher > press F8 (Sales).
- Press Ctrl+H(Change Mode) to ensure that the voucher mode is set toItem Invoicemode. A user can confirm the same if they see the Name of the Item on the voucher screen.
- You can also enter the reference number and date for the invoice by pressingF12(Configure) and setting “Provide Reference No. and Date” to Yes.
- PressF12(Configure) and; set the optionModify Tax Rate details for GSTtoYes. Select theClassification/Nature.
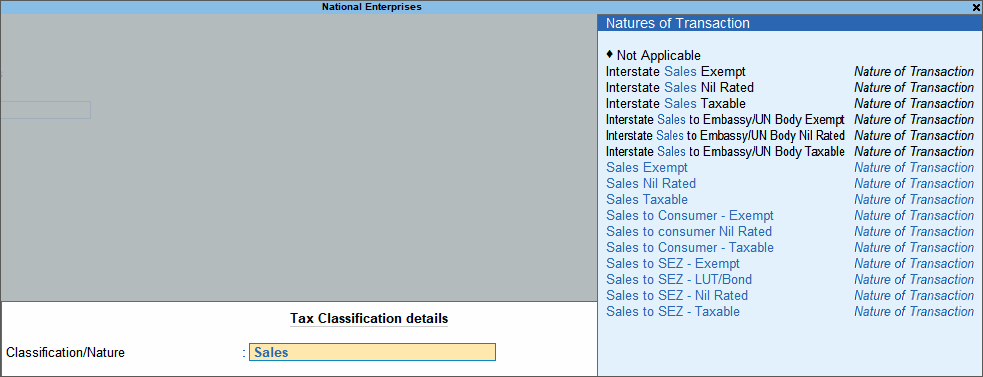
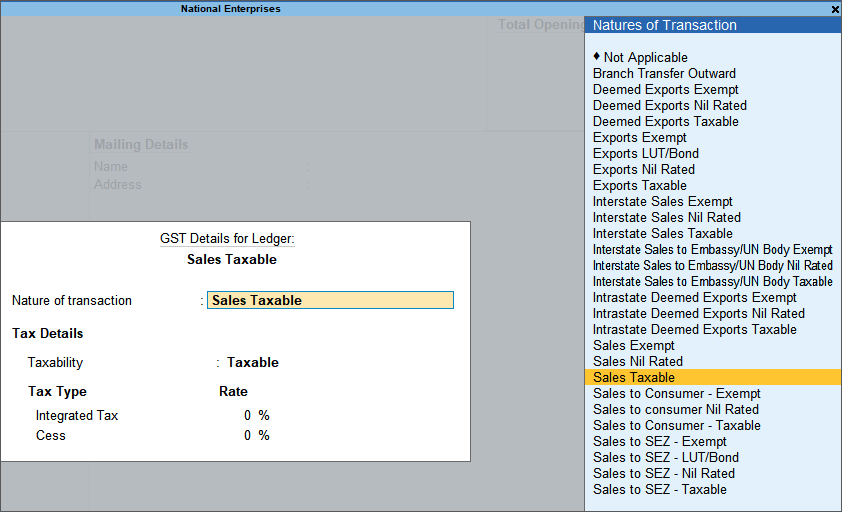
However, If you do not see this option, set “Show more configurations” to Yes.
- Now Specify the buyer details in the purchase and sale entry with the following information:
- Enter the Party A/c name: You need to Select theCashorBankoption while passing the cash sales transaction. If there are credit sales, then select the party name.
- Party Details: ToDispatch, Order, orBuyerdetails to be part of your invoice, provide the relevant information.
- Select the stock items defined with different GST rates, and specify their quantities and rates separately.
- Now you need to Select the central and state tax ledgers. GST will be automatically calculated based on the GST rates defined in the stock items.
PressF12(Configure) if unable to see theParty Details screen and set or turn “Provide Dispatch, Order, and Export details” to Yes.
- Enter the Dispatch and Order Details: You can also print these details in the invoice for the buyers or future reference by entering these details. However, if you already have a Delivery Note or a Sales Order, it will be pre-filled as a delivery number or sales number.
- Buyer’s Details: In cash sales, specify the buyer’s details.
Note: The regular customers of a business may need specific details, such as address with a landmark, alternative contact number, and so on, to appear in the invoices they receive. In such cases, one creates party ledgers with the required details, such as Address, State, etc.
- In theBuyersfield, select the necessary ledger.
- As always, you can press Ctrl+A to save and proceed.
- Select the accounting ledger to allocate the stock items.
- ForItem Invoice, select theSalesledger.
- If you do not see this field on the screen, press F12 (Configure) and select“common Ledger Account for Item Allocation” to Yes.
- However, you need to set this option as No to allocate the sale of each item to different accounting ledgers.
- Provide stock item details.
You can also create the item or ledger while passing the entry by pressingAlt+C.
- To pass entry ForItem Invoice, select the stock item, and enter the quantity. The rate will be auto-filled if available for the stock item. Or enter the amount by yourself.
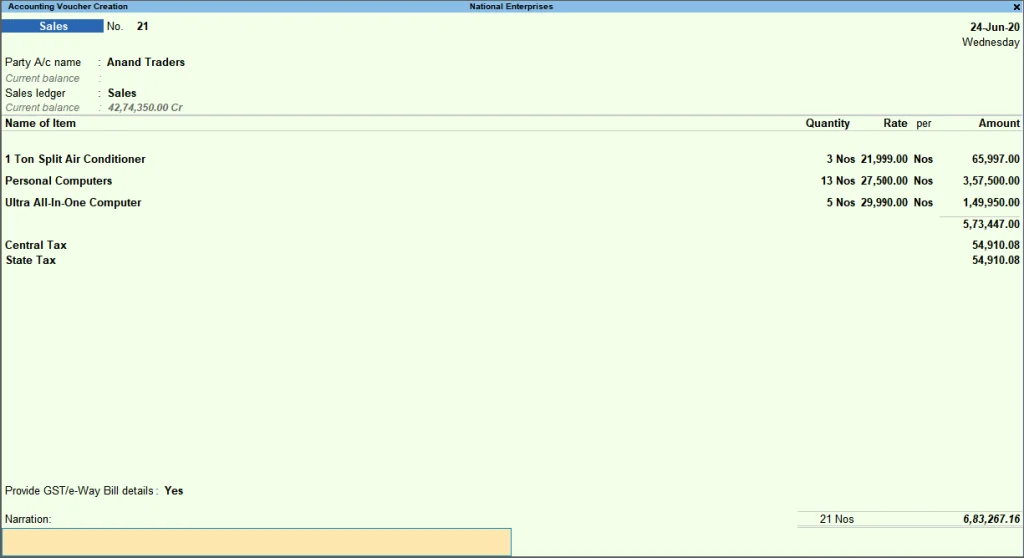
PressCtrl+Oandgt; type or selectGST – Tax Analysis to view the tax details. PressAlt+F5 (Detailed)to view the detailed break-up of tax.
- You can Select the additional ledgers in purchase and sale entry for transportation charges, insurance, or discounts.
- At last, ProvideNarration.
- Accept the screen. Or, to save, you can press Ctrl+A.

To Print the sale invoice, follow the below-mentioned steps:
- First, select the invoice you want to print and press Ctrl+P. Or you can pressAlt+P(Print) and; pressEnteronCurrent.
- You can Press C(Configure) to configure the print options for your invoice.
- PressC(Configure) andgt; type or selectPrinterandgt; and pressEnterto change the printer setting.
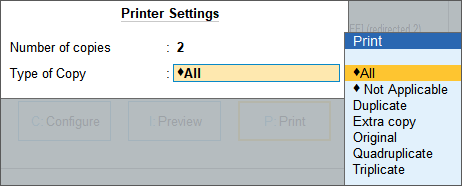
- To print multiple copies of the invoice, select and provide the number of Copies and; type or selectType of Copy.
- PressI(Preview) to check the invoice details before printing.
- At last, PressP(Print) to print the purchase and sale entry invoices…

